DISCLAIMER: This installation summary is provided for informational purposes only. The author assumes no responsibility or liability for any damages, injuries, losses, or issues resulting from the use or misuse of the information contained herein.
Installation procedures may vary depending on equipment, environment, and individual skill level. It is the user’s responsibility to ensure proper installation and compliance with all applicable local codes, regulations, and safety standards.
If you are not qualified or experienced in performing the installation, please consult a licensed professional.
Part 1 – Trip Bar / Link
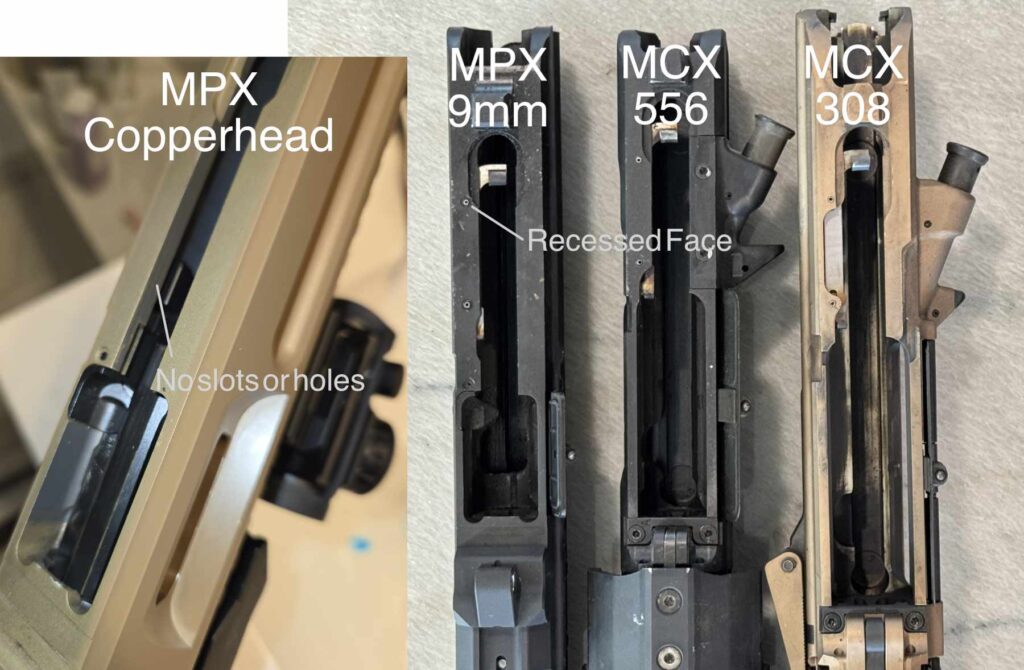
First check for compatibility. Almost Version of the MCX and MPX platform has a slot cut to accept a Trip bar/Link —except some versions of the MPX Copperhead, which may lack this slot entirely.
Additionally, some versions have a recessed pin hole, while others sit flush with the surface. This difference can cause issues if not handled carefully (see warnings below).
The pin hole depth is perfectly sized for a 5/16″ Spirol (the original inventor) coiled spring pin. There is very little to no tolerance, so exercise caution to avoid overdriving the spring pin: – (on receivers with a recessed hole) Driving the spring pin to the lower recess – Using a mushroom-ended spring pin – Using an off-brand or out-of-spec spring pin – On some MPX versions, slightly different tolerances (compared to the larger MCX) that can leave the hole shorter or with less forgiveness
Overdriving the spring pin so its tip protrudes into the bolt carrier’s travel path will potentially cause scratches, binding or permanent damage
It is critical that you inspect after installation: feel inside the receiver along the bolt carrier path for any burrs, raised or sharp edges before inserting the bolt carrier group.
If the spring pin is protruding, removal is simple:
Using a 5/64″ hammer punch, drive the pin all the way through into the bolt carrier chamber. (Using a made-in-USA punch will, naturally, increase your sex appeal!)
Replace it with a shorter 1/4″ spring pin.
In my experience, spring pins can be driven through about 2 times before they start to lose their grip(Fortunately, every package includes 4 pins)
NOTE: Spring pins are a wear item. After a few thousand rounds, they will become dented and require replacement. Exact lifespan varies. Stainless pins tend to wear faster than harder steel pins but generally put less stress on the aluminum receiver. Your mileage may vary.
Our preference is to use the highest-quality made-in-USA Spirol coiled spring pins (coiled rather than split for superior durability). We include both a 1/4″ and a 5/16″ coiled spring pin to give the user maximum flexibility.
We also offer a made-in-USA dimpled punch HERE, specifically designed to minimize mushrooming during installation and uninstallation.
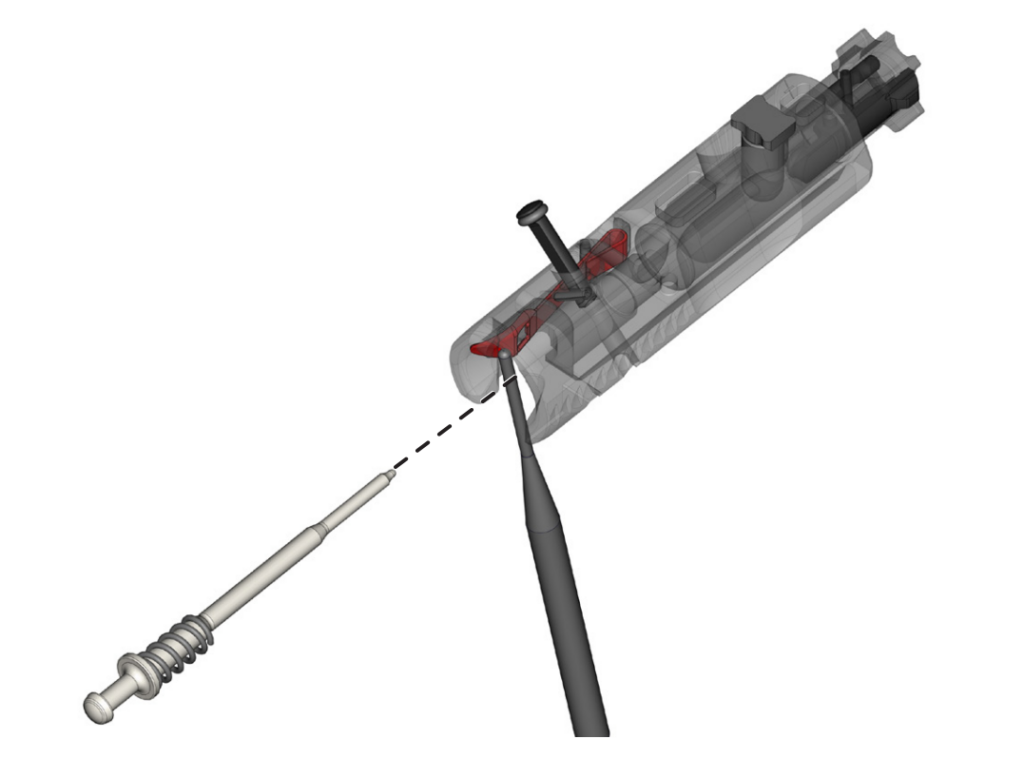
Part 2 – Bolt Carrier/Slam Safety
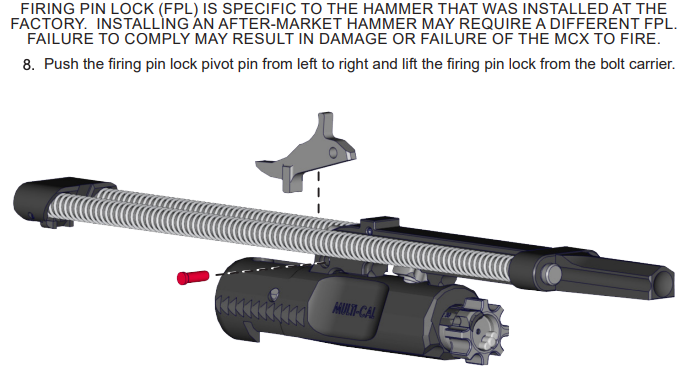
When originally introduced, the MCX “Legacy” models (2015–2016) did not have a firing pin safety latch (sometimes called the “slam safety”).
However, all models from 2016 onward (Virtus and later) added this safety latch on the bolt carrier.
One noticeable side effect is reduced compatibility with many aftermarket triggers.
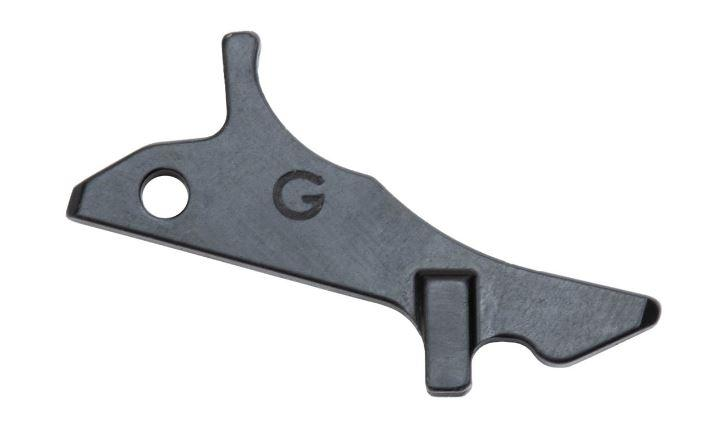
Sig appears to have produced an unpublished “Geissele” edition of the latch, marked with a “G”, for compatibility with certain Geissele triggers—likely required for specific contracts. The KIT-MCX-FPL-GEI can be ordered directly from Sig at 603-610-3000
With the introduction of the Spear-LT model, the bolt carrier was redesigned for broader compatibility with aftermarket triggers by relocating the safety latch to the side of the bolt carrier instead of the top. [Depicted Below]
Summary
As long as the firing pin safety latch remains installed alongside a non-OEM (aftermarket) trigger, you may experience issues ranging from intermittent light strikes to consistent failure-to-fire, depending on your specific combination of aftermarket trigger and latch generation.
If diagnosing a failure-to-fire issue, it can be useful to temporarily remove the firing pin safety latch and test-fire to see if the problem resolves.
To reiterate: Neither Boerne Ballistics nor its affiliates makes any recommendation to modify your factory firing pin safety latch. This information is provided for educational purposes only.